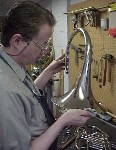
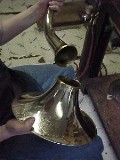
Contrary to some people's beliefs, the only way to properly and safely do a bell conversion is to remove the bell from the body assembly first! We choose this approach without exception, simply based on the geometry of the bell and the screw ring assembly. The bell is tapered, as is the ring. You can't fit a large end through a small end! Any other attempt will result in unnecessary damage to the connecting edges of the bell and bell branch.
Due to the many variations in French Horn designs, the proper screw ring assembly must be chosen. Variations in taper and diameter are critical issues that must be addressed. One size does not fit all when it comes to French Horn bells. Assemblies are made of several different copper alloys: yellow brass, bronze and nickel siver.
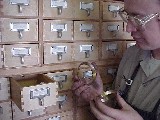
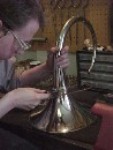
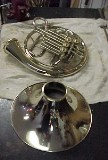
Having chosen the proper screw ring assembly, the bell must be cleaned and have the lacquer removed from the relevant area of application. In this image, this area is located by placing the externally threaded ring in place and applying location markings with an awl.
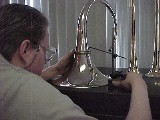
With the externally threaded ring in place and location markings completed, the bell is placed on a large stone leveling bench. With the aid of a scribe, the bell is accurately marked to allow straight and even separation of the bell and the branch.
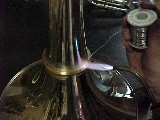
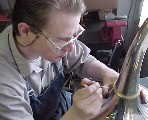
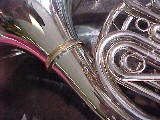
Once the externally threaded ring has been properly placed, it is ready for soldering. In this shot, a 70/30 lead/tin solder is applied with a paste flux. Every effort should be made by the technician to make the solder joints neat and clean.
Now that the externally threaded ring has been permanently soldered into place, we can begin parting the bell flare from the bell branch. This is done by piercing along the edge of the threaded end of the ring with a medium wide jewelers' saw blade. This process requires patience and a very steady hand.
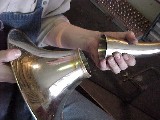
There you have it - we're at the point of no return! After dressing the edges of the cut, we will then be ready to install the internally threaded section on the branch assembly.
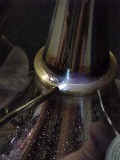
The internally threaded ring has been slipped on from the small end and pulled tightly up to the large end of the branch. The bell assembly is then screwed into the branch assembly threaded ring. The screw assembly is rotated with the bell until it faces the proper direction - engraving forward (in this case). Once it is in its proper placement, we now solder the internally threaded ring to the bell branch section.
Voila! There you have it - we are now ready to clean up the solder areas on both sections, spot buff, and re-lacquer the affected areas.
After cleaning up the solder areas, the bell branch was remounted to the valve and secondary branch assembly. Adjustments were made to allow for clearance of the third valve F and B flat tuning slides. Branches and braces were then re-soldered and carefully polished. The affected areas were degreased and spot lacquered.
After a thorough cleaning to remove any polishing compound or debris that may have migrated internally, the valves are then restrung and aligned, and slides greased. We now consider this project completed.